In this tutorial, Ill show you how to turn this:


The idea here was to make her look like she got into a barfight and the police arrested her and photographed her at the station.
I used Photoshop to do this and have never used PSP or the GIMP, but the techniques I used are all really basic, so I assume it works more or less the same there.
As with every chop, it starts with the source pictures. I chose this source picture because it has the technical quality of a professional studio photograph, but it is still fairly unprocessed, by which I mean that it is not completely retouched and still shows Madonnas wrinkles, the pores in her skin, slightly bloodshot eyes and even a few hairs on her upper lip.
OK, lets start chopping! Well start with the bloody nose. I found a source picture of some guy who used fake blood to create a bloody nose for a theme party. I roughly cut out the part that I needed, put it on a new layer above my Madonna layer and switched the blending mode to multiply.

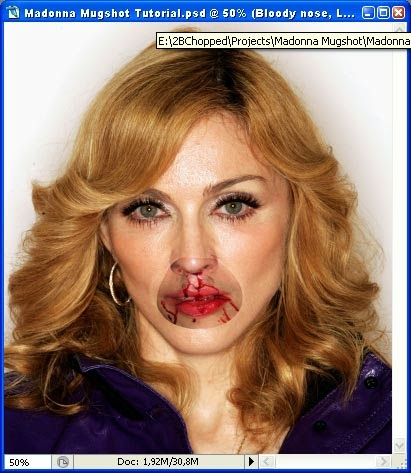
I then masked away everything I didnt like with a soft brush and raised the brightness on the bloody nose layer to about +50 to make it blend in better. Voila, her nose is bleeding!
(Note: to make the Brightness adjustment layer only apply to the bloody nose layer, hold your mouse pointer in between the two, hold down your Alt key and click.)


Next step: the black eye (her right eye).
You could simply paint the skin around her eye with a low opacity soft brush on a separate multiply or colour layer, using yellow, blue and purple colours, but I already told you I am a lazy chopper, so I started by getting a source picture of an actual black eye and followed the same procedure as I did for the bloody nose. Again, I switched the blending mode to multiply, masked away what I did not need and tweaked it with brightness. I also desaturated the black eye layer a bit, because it was too colourful for my taste.


I did not think the result was strong enough, so I muttered some curses under my breath, took out a brush and painted some extra colour on. It was around that time that I realised the entire picture was much too colourful to be taken by a regular camera in a police station, so I simply took the saturation of the whole thing down to -50. This also helped making her face look paler and more worn-out. After all, they picked her up late at night in some shady bar!


I figured Madonna must have cried a little from all the commotion, so I asked my girlfriend if she could please put some extra make up on her left eye and pour some water over it. To stop my whining, she actually did and I made a photograph. Yay!
I also found source pictures of a nasty bruise and some even nastier pimples and I repeated the multiply trick for all three photographs. Really, the bottom line is you can blend almost everything into anything, because you can play around with Hue/Saturation, Brightness/Contrast, Levels and Curves until it looks good. Try to always apply these adjustment layers to the pictures that you want to add to your starting image. If you apply them to your starting image itself, you might be able to blend things in nicely as well, but you are basically downgrading your main source picture, which was already looking fine to begin with.


Were almost done. To finish it off, I added the measuring scale (again, find a source picture and blend it over the background). Since the background is white, this is a simple matter of using the multiply blending mode and youre done. I also darkened the skin around her left eye, painted a little more shadow on her cheeks, drew a few more tiny hairs on the sides of her upper lip and in her eyebrows and used Liquify to raise her right lower eyelid a bit to make it appear more swollen.
Finally, I sharpened the whole image with the Unsharp Mask filter (use a low Threshold value to make details like her pores more visible).
Were done!

You have probably noticed that I have consistently used the multiply blending mode throughout this tutorial. While this is definitely a blending mode that I use a lot, it is really just a coincidence that I have used the same blending mode the whole time.
Make sure to always flip through all the blending modes when youre blending something. Just select the one at the top and then go down the list by hitting the arrow down key on your keyboard. Youll be surprised to see all the cool results. Just pick the one that fits best for the image youre blending in.
No comments:
Post a Comment